SharePoint Excel Import
With this SharePoint add-in, you can import the data in your excel files into SharePoint lists.

Step 1: Launch the Import Tool
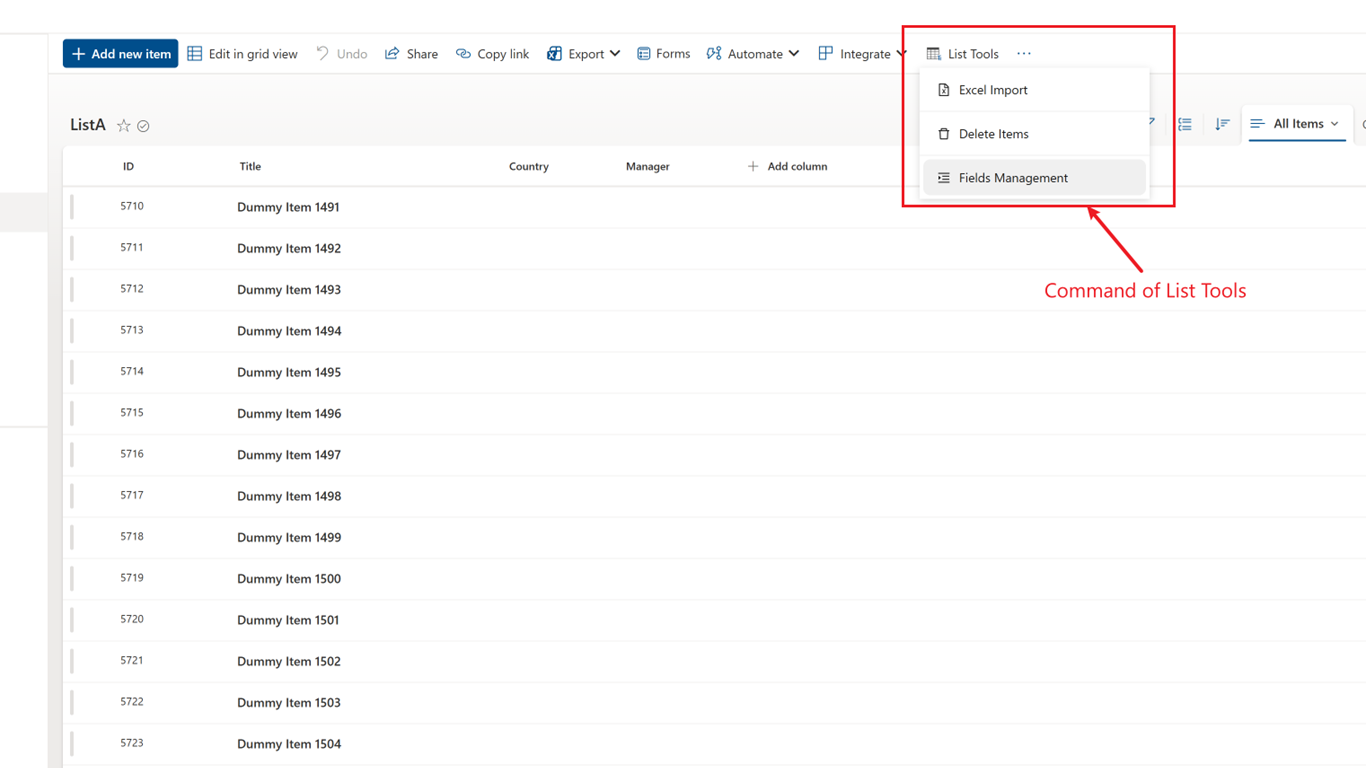
First, on your SharePoint list page, you will see a button named "List Tools". Click it you will see a dropdown menu on which you can click the first option to launch our data import wizard.
Step 2: Select the Data Source
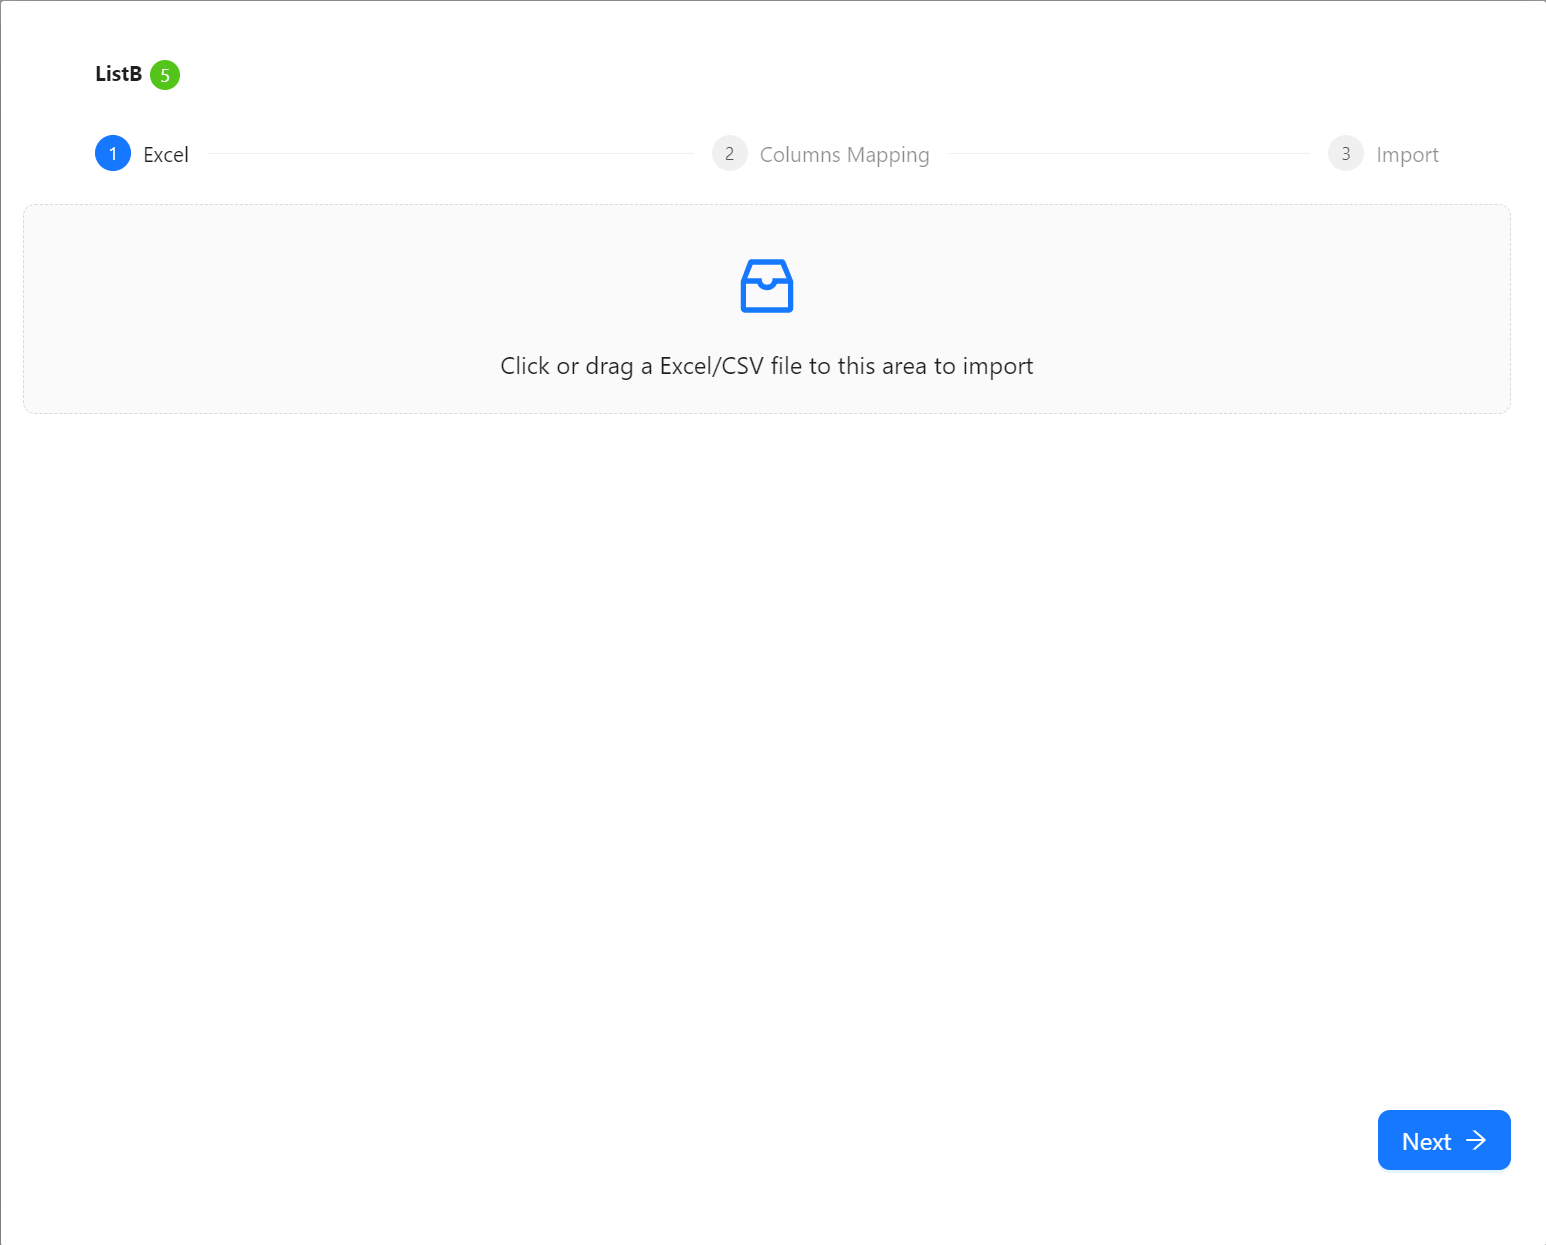
In the pop-up window, click the "Select a file" button to choose the Excel or CSV file you want to import. After selecting the file, if your Excel file contains multiple sheets, the system will automatically ask you to select which one to import.
Step 3: Field Mapping
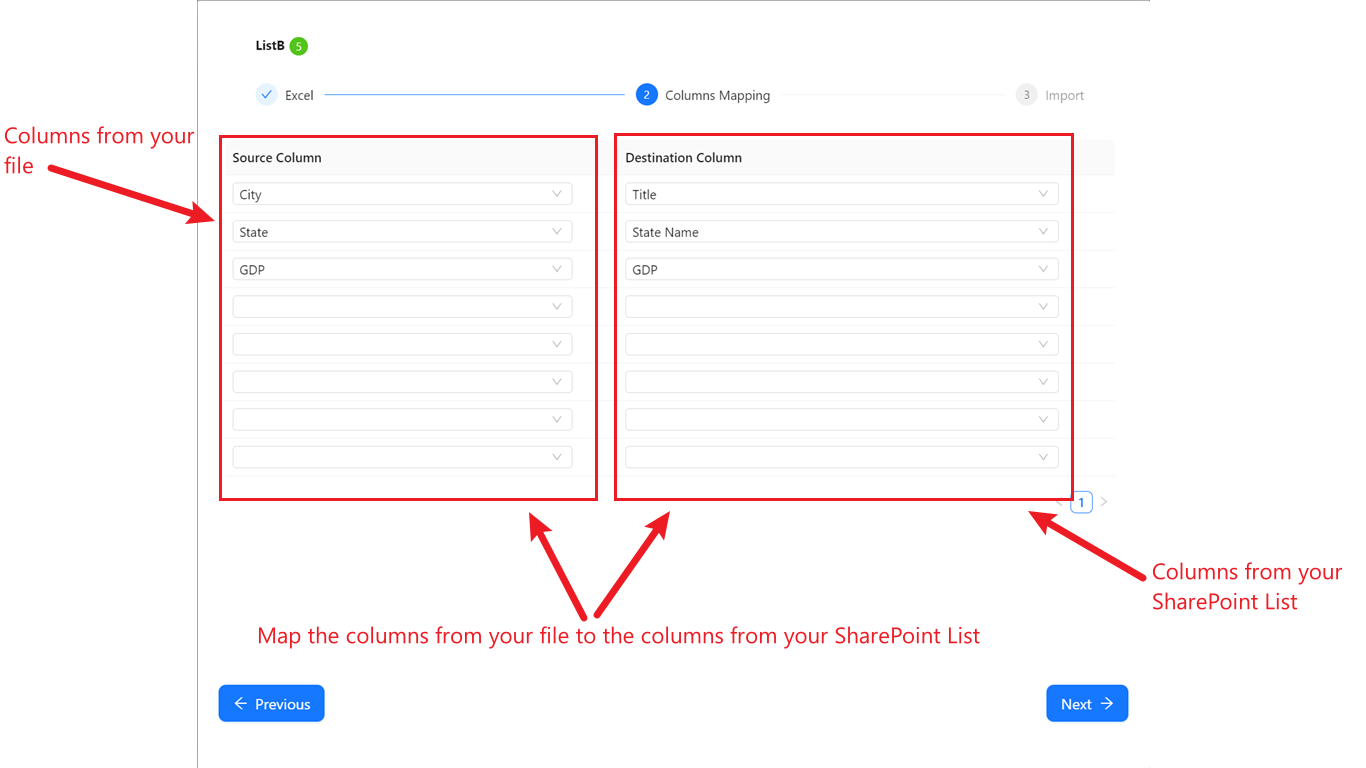
This is a crucial step. You need to match the columns from your Excel/CSV file (Source Field) with the columns in your SharePoint list (Target Field). Our tool provides an intuitive interface where you just need to select the corresponding source data column for each SharePoint column you want to import. Correct field mapping ensures that the data is accurately written to the appropriate location in the SharePoint list.

Step 4: Data Preview and Confirmation
Before the final import, the system provides a data preview interface. Here, you can check whether the data to be imported is correct, including content and format. This can effectively prevent import errors caused by data source issues.
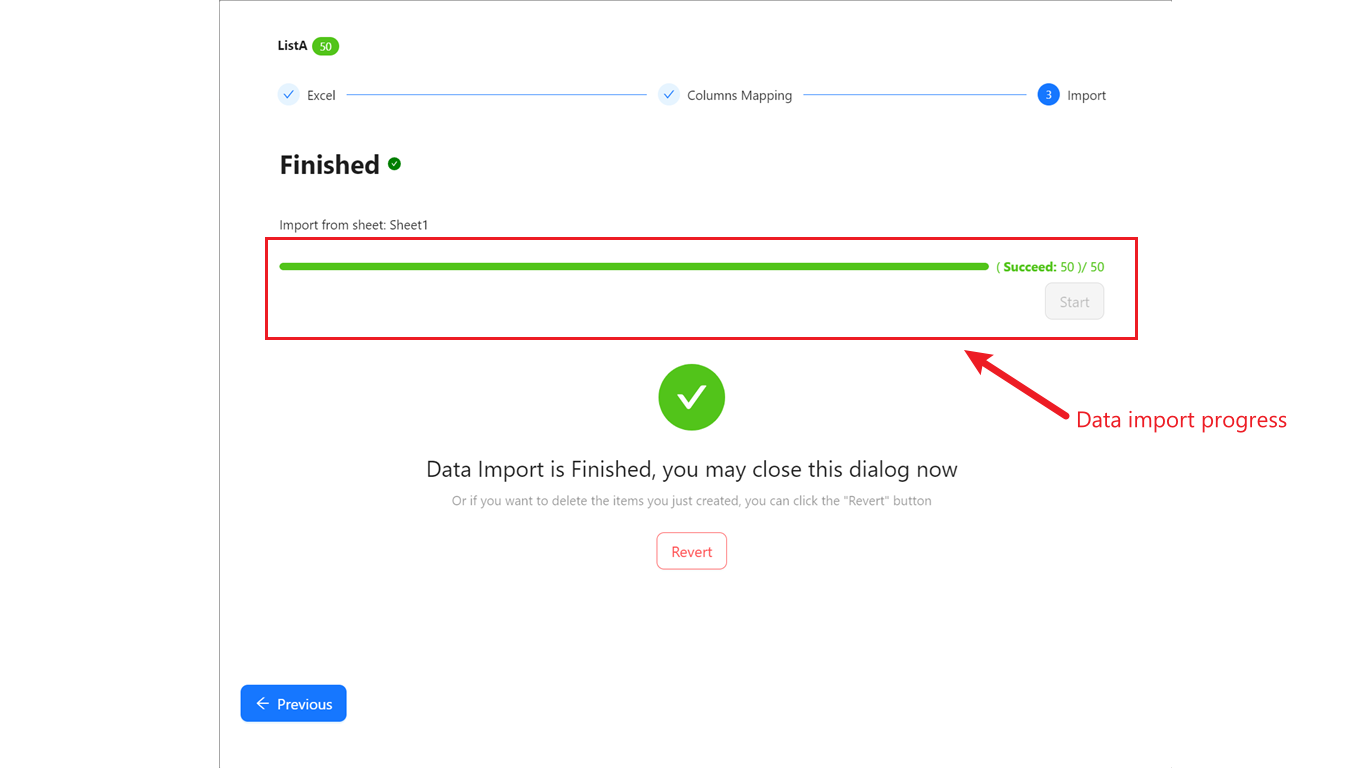
Step 5: Complete the Import
After confirming everything is correct, click the import button, and List Tools will begin the data import task. Once the task is complete, the system will provide a clear success message, informing you how many data entries have been successfully imported.
Purchase
Important: When paying, please provide your SharePoint site domain name (e.g. contoso.sharepoint.com). This is required for license issuance.
- 30-day free trial: No payment is required during the trial period.
- Subscription: After the trial, the price is $40/month or $400/year (pre-tax).
Need assistance? Contact [email protected].